Garden Companions

TomatoI was pondering the connections between plants yesterday afternoon while snacking on a pesto and tomato sandwich. We’ve touched on companion plants in our Phytotheca, where each profile contains information about which plants you can keep as neighbors, as well as which need to stay apart! basil 04

Tomato and basil are a classic example of good neighbors. Why, you might ask? Well, the strong scent of the basil leaves is known to repel or confuse pests which might otherwise make a tasty snack out of the tomato plant’s leaves. Also, basil’s flowers attract pollinators which may also be beneficial in the garden in other ways, like eating pesty bugs. There are even rumors that the plants’ root systems interact in a way that makes them both more healthy and productive. Basically, everything is interconnected, and we don’t even always know how or why. But there is plenty of information out there for the gardener who is interested in companion planting.

Companion planting tips

There are a few ways that plants help each other out. First, like the basil above, a plant can either attract good bugs or repel bad bugs and other pests, which not only protects or benefits itself, but also does the same for its neighbors. Plants in the mint family, like basil, as well as mints, oregano, and marjoram, often fall in this category. So are many other strongly scented plants. Onions and garlic, and others in the Allium family, not only repel bad beetles, worms, and bugs, their strong smells can also keep hungry rabbits away. Flowers can also fit in here, like the marigold which repels microscopic nematodes in the soil while it’s alive, and continues to do so even after you till it into the soil at the end of its lifespan. Marigolds also attract beneficial bugs, which are brought into the garden by its brightly colored flowers. These pollinators may also find their way to your squash blossoms and tomato flowers, making sure that fruits and veggies form. Other bugs that are attracted to certain flowers might also like to prey on pesty bugs like aphids. Native plants are a great way to bring in good bugs as well.

Honey-Bee-Pollinator

Another way plants interact is that they provide shade for each other, or for each others’ roots. Large leaved or spreading herbs keep the soil cool and moist if they’re grown near to taller plants that need a moist or cool environment. Squash leaves are large and often grow low and close together, so they make a good soil shade for hot weather growing. Plants like ginger like a shady environment, which can be found under trees, so don’t leave your trees out when you’re considering a companion planting plan for your yard.

Plants can also support each other. In the three sisters planting method of corn, beans, and squash, corn stalks provide a trellis for the beans to wind their way up. Sunflowers are another good, tall, supportive plant that can become a trellis for climbing vines, as well as attracting pollinators.

Another thing that certain plants in the legume family do is that they take nitrogen from the air and move it into the soil, turning it into a form that is usable by other plants. This soil improvement happens because of a microbial relationship within the roots of these plants. This means that the Rhizobium bacteria that grows in nodes on the roots of the beans needs to be present. If your yard or soil is new to growing beans, you can buy an innoculant that you coat the bean or pea seeds in before planting them. This will ensure that your soil gets its share of nitrogen to be used by the next crop that comes along.

There’s also the idea of a “trap crop,” which is a sort of forfeit to the pests which hopefully keep enough of them occupied that your target crop maintains its health. One example is planting chervil in your garden to attract slugs to it, hopefully meaning they leave your basil and sweet peppers alone!

Read more about companion plants in your favorite gardening book, or talk to an experienced gardener in your life to see if they have any hints. And don’t forget to check the companion plants section in our plant profiles. We’ve got some helpful hints and gardening resources at our store, Culture Garden Market, as well. Happy garden planning!

Our Latest Plant Profiles: Okra, Marigold, Carrot, and more!

You’re in luck, budding gardener! We’re still expanding our Phytotheca Plant Library, and adding new plant profiles for you to reference and learn from. Here are the new ones that we just published today.


Almond Price

Price Sweet Almond

Price Sweet Almond tastes just like the Nonpareil type you buy most frequently at the grocery store. Read more…


marigold gypsy sunshine

Gypsy Sunshine French Marigold

Delightfully yellow Gypsy Sunshine French Marigold is proven to repel pesky nematodes in the soil which could otherwise decimate your crops in the coming years. Read more…


Kale Red Winter

Red Winter Kale

Red Winter Kale is tender and mild when young, but will survive chilly winters and still provide excellent nutrition and taste as it grows. Read more…


Okra Star of David

Star of David Okra

Star of David Okra pods get really wide and plump compared to other types! Read more…


Okra Jambalaya

Jambalaya F1 Okra

The hybrid Jambalaya F1 Okra has all the best qualities of other okras, plus a short growing season that lets you harvest a crop even in the northern latitudes. Read more…


carrot st valery

St. Valery Carrot

Yummy St. Valery Carrots are big and sweet, and store well in a root cellar or kept in the ground. Read more…


STORE

[icon name=”book” class=””] Be sure to keep checking back in for more new plants.


Featured Plant Profile: Common Catnip

We’re busy developing and expanding our Phytotheca Plant Library, and in doing so we’ve learned a TON about edible and medicinal plants. We’ve also learned how overwhelming all of the choices and knowledge can get when planning your garden, menu, or next indoor growing adventure. So we will be featuring different plants here in our blog to ensure you don’t miss a thing!


You’re catnip to a girl like me.

This time around we’re gonna talk about Common Catnip. A member of the mint family, and more specifically a catmint, this herb is well known by pet owners. Since I am now living with a cute and rather crazy cat, I’ve been able to experience first-hand the effects of dried catnip on my feline roommate. She does truly act like a sort of drug addict when she’s playing with a toy her owner made that’s just a sock filled with dry catnip. I also remember my parents planting a catnip in our yard when I was growing up, then having to build a cage around it to prevent our pet from utterly destroying the plant by rolling on it, eating it, and generally beating it up.

So what’s the deal with catnip, and why does it make cats crazy? Well, first, it’s important to note that only about 70–80% of our domesticated friends are affected by this plant. For those cats, the reaction stems from a chemical known as nepetalactone that is found in the leaves and stems of the catnip plant. This chemical acts as an artificial pheromone for cats, triggering sensory neurons in their brains and causing the crazy ecstatic reaction. [1]

catnip03What about other species’ interactions with Nepeta cataria? Some studies have shown the potential insect-repelling qualities of essential oils from the herb. Its flowers will also draw in some beneficial pollinating insects like butterflies and bees. And catnip plants will attract predatory insects like lacewings, wasps, and flies that can help to keep your garden free of crop-damaging bugs like caterpillars and leafhoppers. [2] Cool, huh? Additionally, it is reportedly a deterrent to rats [3], maybe because they know that if they run into this plant, they’ll likely find a cat nearby!

Catnip can also be used as a flavoring in food or found in the mix of some herbal teas. It is observed to be an important element in folk and traditional medicines and as a home remedy for such maladies as wide-ranging as colds, asthma, and delayed menstruation. It’s even been reportedly used for hallucinogenic or psychedelic effects! Leaves are meant to be soothing and calming for anxiety disorders, and roots are said to be a mild stimulant. Applied topically, a poultice of the leaves was used to reduce swelling and inflammation. Over-consumption can cause illness or vomiting, so don’t try any of these uses at home before consulting with a medical expert! [4]

Catnip 04Finally, don’t be surprised if you hear our neighbors from across the pond calling this decorative and strongly scented garden plant catmint or catnep. The names differ, but the plant is the same. Catnip was introduced into North America from Europe, but now thrives here, even growing wild in some places without extra care from gardeners. So, if you think you’ve got a black thumb, catnip might be a good introduction to gardening for you!


STORE[icon name=”book” class=””] Be sure to keep checking back in for more in our to quickly guide you through our favorites of the coolest, easiest-to-grow, or most interesting plant varieties we’ll be hand selecting for you.


Sources:

The Scientist: How does Catnip Work?
A Natural Insect Attractant from Catnip. Agricultural Research Magazine. May/June 2007.
A Modern Herbal: Catmint by Maude Greive, 1931.
Catnip: It’s Uses and Effects, Past and Present by Jeff Grognet.

Planting Your Summer Garden

It’s time to get this garden party started!

Welcome to the third installment of our Summer Garden Series. If you’ve been keeping up with our Planning and Prepping posts, you’ve already picked your garden spot, readied the soil, gathered your supplies and tools, started seeds indoors, and are possibly in the process of hardening them off! In this post, we’ll be discussing how to plant those pretty babies and get them on their way to being happy, healthy, and bountiful. Remember: planting your garden is an investment, and successful gardens are cared for daily. Think of your garden as your new pet: fill it with love, attention, and patience, and it’ll reward you with deliciousness while making your hood a more beautiful and life-sustaining environment.


Planting Your Summer Garden


Step 1: Consult with your timeline

Your plants are hardening off outside, your seed packets are ready to burst on your counter, your tools are piled up and ready to get filthy. So what are you waiting for? Most likely, you’re actually waiting for the right time. Because all plants grow at different rates and like to be planted at different stages of the spring (or fall!) season, timing your transplants and outdoor sowing is key to a great and long summer and fall harvest.


What Can I plant, and When is Too Early?

planting your summer garden blog post 13Maybe you want to grow Red Russian kale, which can be sown outdoors 1–2 weeks before your average last frost. You might also be dying to get your Black Krim tomatoes in the ground, which cannot survive frost and should only be planted when the soil is at least 60°F. As you can see, transplanting and sowing varies by weeks and even months depending on the plant and your USDA growing zone. For best growing results, we recommend drawing a timetable for planting. As an expert, a gardener’s knowledge becomes intuitive and is based on seasonal changes from year to year. For the beginner, however, you can simplify the process by grouping certain types of plants together: greens and herbs, frost-tolerant veggies, non-frost tolerant veggies, and fruits. Check our Phytotheca for outdoor planting information to group your plants into a timeline.


Step 2: Planting your starts

With your hand drawn garden plan, your meticulous timeline, and your starts and seeds eager to get into the ground, you’re ready to plant! For each round of planting you do, we recommend transplanting seedlings before sowing any seed directly into the soil so that you don’t accidentally step on them. Starts are easier to avoid when stomping around the garden. We’ve also found that laying some well-placed paving stones or bricks will be beneficial to stand on while gardening and harvesting if planting in a large plot.


Dig them holes.

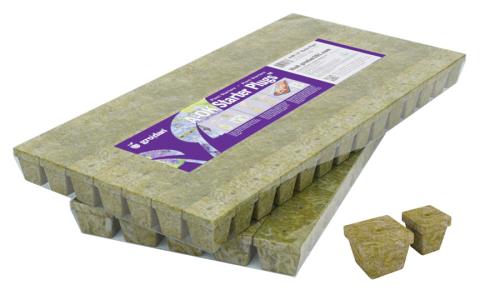
Starting from the most inaccessible portion of your garden and moving towards the most accessible, dig holes where your starts will grow into full, fruit bearing plants this summer. Be sure to check any info on the plants (if bought from a nursery) or check out depth information in our Phytotheca for how deep the holes should be. A general rule of thumb is to dig a hole a couple inches larger on each side of the root ball and a couple inches deeper than the original height of the soil in your growing pot. Then, mound some extra soil in the bottom of the hole: this will be the seat where your plant will plop its bottom. Add any amendments necessary to make sure your plant’s roots grow strong during the first week of living outdoors.


Prep your rootball — or Leave em be!

After your holes are ready with their little seat, you’re ready to plant. Now, you may have two different types of transplants: ones in plastic growing pots, whose rootballs need a bit of massaging before planting, and ones in compostable pots. The latter are usually plants that don’t transplant well and should be sown directly outdoors. However, not all of us are lucky enough to have long, hot growing seasons (especially me, at 8300′). Plants in compostable pots should be planted, pot and all, directly into the hole, mounding dirt in the sides of the hole until the ground is even.

Plants that do transplant well need a bit more love. Remove the plant from its pot, being careful to not break the stem or tear any leaves. If using plastic pots, we recommend gently squeezing the pots on each side to loosen the soil and roots. Once the rootball and soil come loose, gently take the plant out of the pot and, with one hand, gently break apart the rootball and remove excess soil. More vigorous starts can be shaken for this purpose. For large rootballs, gently massage your fingers into the center of the ball to loosen the roots. Don’t worry if some roots get broken: this can actually help the plant grow more vigorously when in the ground! After this, place the now-loose roots over the mound in the hole, and fill it with soil until the ground is even. In both cases of transplanting, pat the soil down with your hands to give your plant stability and avoid a sinkhole when watering.


Mark your beauties.

Make sure to mark your transplants with a small sign so you can track how different varieties and cultivars fare in your garden! For the frugal gardener, write the names of each type of plant with a marker on popsicle sticks that you can plop into the ground. For a more esthetically-inclined grower, there are many fancy garden signs you can purchase, some with thin metal flags where a plant’s name can be etched into the surface! Either way, it’s great to be able to compile information on each plant to make you a better gardener each year.


Step 3: Planting your seeds

Now that your starts are in the ground, you can begin to see all your hard work paying off! Take pleasure in the new colors of your garden and enjoy knowing your babies will be growing large, full, and strong in the coming months. It’s time to take your seed packets, or self-harvested seeds from last year, and put them in the ground.


Visualize your garden seed plots.

Take a look at the plant profile for each of the plants you are directly sowing into your garden in our Phytotheca to determine depth and spacing for your seeds. Some plants, like Vertissimo chervil, will be gently pressed into the soil surface in a group of 3 seeds every 6″ or so apart. Others, like Antigua eggplant, will be planted 1/4″ into the soil, with one seed every 18″. We never said plants weren’t particular! Luckily, we’ve compiled all this information for you so you don’t have to worry.


Plant your seeds.

For “press into soil” seeds, lightly spread seeds above the soil and pat into the ground. These seeds usually need sunlight to germinate, which is why they don’t want to be stuck deep in the ground. For the seeds that do need deeper planting, simply stick your finger into the soil at the intervals suggested across the plot that you want filled with this specific variety of plant. Plop the seed or seeds into the holes, cover with soil, and lightly press down to make the area firm so that seedling roots can grow strong and thick. You can also dig a small trench for your seeds to maintain a straight row of future sprouts. Don’t forget to mark these beauties as well! Putting up signs for your sown seeds is even more important than your starts because it can be difficult to determine what’s what as they sprout from the ground!


Step 4: Mulch, Sturdy, Thin, Care

The plants are in, and now you get to sit back, relax, and enjoy your bounty, yeah? Well, not so fast… healthy harvests depend on constant care and attention throughout the growing season.


To mulch or not to mulch.

Mulch is a necessary, but often overlooked, growing aid for gardeners and can be made of anything from leaves to grass clippings, wood chips, bark, straw, and even plastic chips (however, we recommend NOT using plastic for sustainability reasons). These mulches are added on top of the soil of your garden to help retain moisture, improve fertility of the soil (as they decompose, each adds a different nutrient or nutrients to your garden bed), suppress weeds, and beautify your plot. Mulch can also help protect delicate plants from freak frosts or late cold snaps before a final harvest. Make sure to wait until your seeds begin to sprout before covering them with mulch, since the added layer of darkness may slow or stop germination.


Sturdy those big growers.

For larger, sprawling plants, such as tomatoes, tomatillos, peppers, grapes, and other fruit-bearing friends, we recommend using a trellis or some type of support to keep heavy fruits off the ground and away from critters. It’s important to insert your trellis or cages at this stage in growing, so that you don’t damage the roots of your plants when they get bigger. This goes for stakes and other support systems as well: adding these later in the season can puncture or sever roots underground.


CARing is Key — Doting is preferred!

Keep an eye on your plants as the season begins to turn warm. Everyday, check your transplants for new growth: when you begin to see new leaves sprouting from a node, you can be sure the plant has anchored itself and it on its way to deliciousness. After a few weeks, you should start seeing your seeds sprouting out of the soil. Take note of thinning information in our phytotheca. Since most plants are sown closer together than necessary (in order to maximize healthy numbers of seedlings), you will need to pluck out or clip the weaker sprouts. But don’t be sad! These sprouts can be thrown in to a salad or sandwich, and allowing ample space for the seedlings you leave in the ground creates the perfect conditions for vigorous and healthy mature plants.


Congratulations! You’re now the proud guardian of your very own garden! You’ve done the most labor-intensive part of the process. Now, you get to become the inspector of leaves (watch for aphids and other pests), the green thumb doctor (our phytotheca has information on remediating weak soils, noticing deficiencies, and strategies to mend your sick plants), and the giver of life (water water water!). And don’t forget to sing and talk to your plants: a little love goes a long way.

Keep up with our gardening blog to read all about different aspects of care and growing as the season continues into what we hope is a beautiful, safe, and productive summer.

Prepping Your Summer Garden

Feeling ready to take advantage of this delightful spring weather and start getting your hands in the dirt? We sure are!

So hopefully you’ve had enough time to get through all the steps lined out in part one of our Summer Garden Series. If so, you know what you are going to grow, where or in what you will grow it, and, if you’re starting in the ground, what your soil type is. Our next steps are going to be preparing your soil or other growing medium, getting your gardening supplies, and starting seeds or buying transplants. So let’s dive into our second edition!


Prepping Your Summer Garden


Step 1: Prepping Soil or Site

dirt ground placeholder


Your soil test is good and you’re going to grow directly in the ground.

dirt garden sprout plantLucky you! You’re in the Goldilocks zone of soil with a nice loamy, rich ground. All you’ve got to do with your site is make sure to get rid of any weeds, and you should be good to go. Some organic weed control options to get you going are sheet mulching (to smother the weeds) or hand pulling (if you’ve only found a few).

If you’ve got a space that’s super overrun with weeds and are patient enough to wait to start growing there, you can solarize your garden area by covering it with a sheet of clear plastic for 1 to 2 moths of hot sunny weather, usually starting in the late summer. This process should kill most weeds, weed seeds, and soil pathogens and will have you ready to start some fall crops or green manure cover crops that will set you up great for growing veggies next year.


Your soil needs some amending

gardening mix soil scoopSo if your soil is in need of some love, first you’ll need to determine what it needs. Generally, the addition of organic matter is a good solution for soils that are either too sandy or too clayey. However, each requires a different type of organic matter.

Sandy soils will benefit from well-aged compost or manure in order to help increase the water holding capacity of these loose and quick-draining spots.

Clay-heavy soils will be helped by the addition of fibrous organic matter like composted mulches, straw, or well-rotted manure. These materials will improve aeration and drainage in this soil type.

No matter which type of soil you are amending, it is good to have a mix of short and long term solutions. Things like grass clippings and manure will decompose rapidly, breaking down and feeding your plants quickly in the first few years. Other soil components like straw and mulch will stick around for much longer and provide benefits well into the future. Similarly, calcium additions like gypsum, dolomitic limestone, or calcitic limestone will quickly provide this nutrient to plants, but using other materials like eggshells or oyster shells will provide a longer-term solution.

One important caveat is to not over-amend your soil. It may take years to get the ideal soil, so don’t try to rush it and create more problems for yourself. For annual vegetable and herb gardens, it’s likely that you’ll be able to keep adding more amendments each year or each season, and overdoing it in one year can result in nutrient imbalances which stunt plant growth (too little available nitrogen) or burn them (too much available nitrogen), or even cause salt build-up in your soils (this is particularly a problem with the use of manures). Uh-oh.


You’re growing in a container or raised bed 

raised bed gardenIf you’ve decided to build your own raised beds, you’ll need some materials. We recommend picking sustainably certified wood or using re-purposed materials like you might find at a used building supply store. Here in Boulder, we’ve got ReSource Yard, but many communities have a Habitat for Humanity ReStore, another great place for finding gently-used building supplies. You could also make a garden by finding discarded pallets and using those to build your raised beds. Just make sure that their wood hasn’t been treated with any chemicals: if you find a stamp with the letters HT, meaning heat treated, then you’re good to do. A second option would be buying some pre-built raised beds or ready to assemble building kits.

Once you’ve built your bed, you’ll need to clear and level the site it will go on, and it’s best to incorporate some sort of organic weed barrier at the bottom. We recommend layers of burlap and/or cardboard at the bottom of the bed, and a thick layer of mulch around the outside path area to keep weeds down.

If you’re going to go for container gardening in a smaller space, you’ll have to find some large containers and a soil or soilless mix to fill them with. Most plants like to have at least 6–10” of depth for their roots, with root crops needing more. There are plenty of self-watering planter designs to check out that will keep your maintenance time down if you’re feeling busy.

pots pile containersOnce you’ve picked your container, you’ll need to find a soil blend to fill it with. Look for a complete potting mix that is well drained and contains organic ingredients like topsoil, coco coir, perlite, and/or vermiculite, and make sure your mix contains an organic nutrient source like compost or worm castings.

For some extra fun, you can make your own by buying individual components for a custom mix. Use clean and sanitized topsoil, compost, sand, coir, bark, perlite, vermiculite, limestone, and a natural fertilizer source.


 Step 2: Get Your Gardening Supplies

tool garden
All gardeners need a tool set, so pick up some good quality hand tools for a start. A shovel and rake will be helpful for spreading and mixing those amendments into the ground, and a hoe will make weeding go quickly. A wheelbarrow or cart is great for hauling amendments and moving flats of transplants from their nursery location to the planting area, if you’ve got a large space.

You’ll also need flats or small containers to start seeds in. Buy some pots or find your own DIY or upcycled solution, but make sure that each container has adequate space for roots and is large enough that it won’t dry out too quickly (egg cartons are not an ideal choice here). Be ready to transplant seedlings into bigger containers as they grow.

If you’re starting seeds and/or growing indoors for season extension, a lack of outdoor space, or for a fun and air-purifying experiment, you’ll need some growing lights. We recommend using high output fluorescent bulbs for starting seeds and for growing herbs, root veggies, or leafy greens. If you want to get some fruits (tomatoes, peppers, squash) out of your indoor garden, you’ll need a brighter and more powerful lighting system to make plants switch over to flowering and fruiting. Here, we’d recommend an LED setup or HID metal halide lamps. You’ll also need a timer system for the lights and some fans to keep air flow going and promote healthy plants.

All plants need water, so get a watering can based on the size of your growing space. Small indoor herb gardeners can get by with a cute little watering can, or go for a bigger one or an irrigation system for your outdoor garden.


Step 3: Getting your plants ready

file000589794879


Starting seeds

No matter what and where you’re growing, you will need plants! Seeds or starts should be chosen based on your timeline, average frost dates, and what you’re growing. Check out our extensive Phytotheca database for the plants you’ve chosen to see how easy or hard they are to start from seed, how long they take to germinate, and whether we recommend that you plant inside or outside. Based on this information, you can easily decide which seeds are worth buying, which to start on your own indoors, and which can be sowed directly in your soil or growing media outdoors.

sprout start tomatoIf you’ve decided to buy starts from a local farm or grower, you can skip this next step! But we recommend trying at least a few seeds indoors on your own for a growing experiment.

First, fill your flats, containers, or small cups with a seeding mix. This soilless mix does not need any nutrients, as seeds actually contain all they need to grow in their first set of “seed leaves.” The mix also needs to be sterile, so that your baby plants can germinate in a clean and healthy environment. This initial phase of development is super important for plants, so they need to be kept moist and in a well-lit and stable temperature environment. Check out the Phytotheca entries for information on what temperature each seed needs to germinate, and use a heat mat if your growing conditions indoors aren’t adequately warm.


Caring for Starts and Transplants

Most seeds don’t need light to germinate, but once they’ve sprouted leaves, they will need a light source, as will any transplants you’re not quite ready to put in the ground yet. Keep lights close to the plants to avoid seedlings getting too leggy and weak stemmed, and adjust the light up as plants grow to keep them from burning. They’ll also need some nutrients as they get larger. Once a week, you should water little plants with a very dilute solution (half to quarter strength) of liquid seaweed, fishmeal, or balanced liquid fertilizer. Keep the soil evenly most at all times, and provide air flow for plants with a small fan to strengthen them.

Before planting transplants, whether you’ve grown them or bought them, they’ll need to adjust to outside conditions. This process is called hardening off and requires you to set your plants outside, in a shady location at first, for gradually increasing time periods during each day. You can also slowly increase the amount of direct sunlight that plants receive each day, until they are ready and well adapted to the conditions you will be planting them in.


pumpkin sprout 01

OK, that’s it for this edition. Check back in soon or keep an eye on our Facebook page for the next edition in our summer garden series, and what might be the most exciting phase of your gardening process: Planting Your Summer Garden! We can’t wait.

Featured Plant Profile: Mexican Chia

We’re busy developing and expanding our Phytotheca Plant Library, and in doing so we’ve learned a TON about edible and medicinal plants. We’ve also learned how overwhelming all of the choices and knowledge can get when planning your garden, menu, or next indoor growing adventure. So we will be featuring different plants here in our blog to ensure you don’t miss a thing!


In terms of nutritional content, a tablespoon of chia is like a smoothie made from salmon, spinach, and human growth hormone. As tiny as those seeds are, they’re super packed with omega-3s, omega-6s, protein, calcium, iron, zinc, fiber, and antioxidants. If you had to pick just one desert-island food, you couldn’t do much better than chia, at least if you were interested in building muscle, lowering cholesterol, and reducing your risk of heart disease; after a few months on the chia diet, you could probably swim home.

Right now, Chia has become kind of an important plant in my life. I first heard of it as a food when reading Born to Run by Christopher McDougall, back in 2010 or so. I’ve not tried to grow it yet, though with all the information I found while researching Mexican Chia, I am now a lot closer to realizing that potential!

One important thing to know about this annual mint family plant is that, because of its adaptation to the tropical conditions of its native range in Mexico, most types only start to flower and make their nutritious seeds in the fall, once day lengths are beginning to shorten. Unfortunately for us temperate climate growers, this coincides with the start of fall frost season, which will damage or kill the plant before the seeds are ready! Bummer. Luckily, breeders in Kentucky are working on some new strains which will have earlier blooming times, while days are still long.[1] These advances will help to bring cultivation of this food further north, which is great as it gains popularity in the United States and other western food markets. Demand for this seed is shooting through the roof, while drought conditions in the current growing areas of Central and South America could produce strains on the market.[2]

Salvia hispanica chia seedsAnother good option to consider is indoor or greenhouse growing if you’re trying to get seeds. If you’re able to protect plants from the cool weather, they should flower and develop seeds in the fall in any climate. As another option, you can grow sprouts or microgreens. Use a moistened well-draining soilless medium like coco coir and scatter seeds on the surface. Water regularly once germination has begun and grow under good lighting to keep these baby plants nice and green. Harvest either once seed leaves have emerged and shed the seed husk, or after the first set of true leaves have appeared, giving them enough light to grow green leaves and prevent leggy, weak stems. Eat your bounty as soon as you can, since they don’t store well.

A surprisingly large number of people have been curious about what, exactly, it is that I’m drinking, sparking good conversations about food and healthy eating. I recommend you go get some chia seeds today and try a new dietary experiment.

My favorite way to eat the seeds is to mix them in with water, lime juice, and a splash of apple cider vinegar. Sometimes I will add a pinch of ground cayenne pepper as well. This makes a goopy, gelatinous mixture that is delicious to drink as breakfast or as a snack throughout the day. I’ve been carrying a jar of it around during my outdoor adventures rock climbing or hiking, and it really does offer a boost of energy that keeps me from crashing during a long day of demanding physical activity. They also keep your body hydrated by holding something like 9–12 times their original weight in water. Obviously this is very important in the dry Colorado climate.


STORE[icon name=”book” class=””] Be sure to keep checking back in for more in our  to quickly guide you through our favorites of the coolest, easiest-to-grow, or most interesting plant varieties we’ll be hand selecting for you.


Sources:

University of Kentucky Center for Crop Diversity – Chia
Chia boom: With 239% growth, chia category set to hit $1 bn by 2020. By Stephen Daniells, 22-Nov-2013

Planning Your Summer Garden

It’s finally here folks! Spring has officially SPRUNG and summer is just around the corner, which means it’s time to start planning those gardens!

I’ve always loved summer more than any other season. To me, summer means beaches, playing outdoors, sunshine and perhaps best of all, FRESH VEGGIES!! Whether you participate in a local CSA, frequent the farmers market or plant your own garden, summer is a time to be outdoors and to revel in the magic that is the earth’s ability to make food grow. And while we fully encourage you to support your local farmers, we also believe that the best way to get fresh food into your kitchen is to grow it yourself! True, coaxing plants out of the ground is not always an easy task but the benefits are absolutely worth the efforts and we at CC Grow are here to help you every step of the way. So without further ado, lets get you gardening with our first edition in our Summer Garden Series.


Planning Your Summer Garden


Step 1: Setting an Intention

Spring

Gardens are not just a resource for food. In many ways they are an art form, a means of expression, a place to escape and a way to reconnect with ourselves as well as the earth. As such, they should be planned with consciousness, care and an idea of what we want to get out of them. This is why a great first question to ask yourself is, what do I want from my garden?

Are you looking to have a garden filled with as many options of vegetables as the supermarket, or are you feeling like you may only have time for one or two favorites? Do you want to try to plant something new and exotic, or are you feeding picky eaters? Is the appearance of your garden as important as it’s functionality?

These are the types of questions whose answers will help you narrow down your garden goals and set priorities. Then when it comes to questions of space and time, you can make appropriate decisions that will help you set yourself up for success.


Step 2: Gauging the Essentials

file5301305395463

Even the most “green” gardener knows that soil, water and sunlight are essential when trying to get things to grow, so this is a great place to start when planning your garden.


Let there be Light!

Yes, lighting will change slightly with the seasons but you definitely want an idea of where you fall on the sunlight spectrum before you start digging into the dirt.

Take a few days to figure out where you are planning on putting your garden and watch the lighting. Does your area have full sunshine or are there obstructions? How long does that area get light? Many types of summer vegetables need at least 6 hours of light per day so try to choose an area that meets this requirement. If this is not possible, never fear! There are plenty of plants that actually prefer shade or partial shade but this is important to know ahead of planting time.

If you are completely lacking consistent sunlight, planting in containers is a great option as these can be moved to different areas to catch some rays. Keep in mind however that you don’t want to be lugging your pots around all day (especially heavy ones!) so planting shade-friendly plants will likely still be your best option.


Water, Water Everywhere or Not a Drop to Spare?

 Spring blogDepending on where you live, you can generally make a good guess as to how much natural precipitation you are going to get during the summer.

Here in Colorado for example, we experience long periods without any rainfall so a good gardener will keep in mind that a lot of irrigation will need to be done by hand. If you’re planning a large garden, check out where your spigots are and if you’ll be able to set up a sprinkler or drip irrigation system. A drip system is one that utilizes tubes with tiny holes pre-punched into the surface. These tubes can be hooked up to a barbed fitting that will attach to your spigot. The tubes are then laid throughout the garden where they will—you guessed it—drip, providing a slow but constant source of water for your plants.

If an outdoor water source isn’t available, consider scaling down your garden as filling your watering can 50 times can be a real pain, or plant in containers that can be brought inside and watered in the kitchen sink.


Lets Get Dirty: Testing your soil quality

If you are planting your summer garden in containers or raised beds, you spring blogwill have the freedom to hand pick the soil that you are going to be working with. In order to make the most accurate choices, you will need to select your plants first, so feel free to skip to Step 3.

If you are planning on planting directly in the ground however, you will first need to figure out your dirt quality and characteristics.The first thing you want to know about your soil is what kind of texture it has. Although you can send away a sample of your soil to local labs or extensions for testing, we recommend a simple hand and ribboning test.

The Hand Test: Grab a handful of soil (go on, don’t be shy!) and remove any rocks or bits of debris and break up large clods. Moisten the soil in your hand (an old college professor of mine used to swear that spit is best but we’re sure tap water works great too!) and squeeze it into a little ball. As you are working your dirt into a ball, try to feel what’s present in the soil. Does it feel grainy or smooth? Does it work into a ball easily or is it falling apart? Keep these qualities in mind as it will be important in the next step of the process.

Ribboning: After a minute or two of forming your soil into a ball, you are going to start “ribboning” it. To ribbon your dirt, push the ball with your thumb against your forefinger so it starts to flatten out. It will break off under it’s own weight, and these broken pieces are the bits you will need in order to figure out your soil content. Once you have a couple pieces of “ribbon”, use the below chart from the Colorado State Extension Service to identify your soil texture.

Screen Shot 2015-03-20 at 10.01.07 AM

If your soil is overly sandy or very heavy in clay you will have to add amendments before planting or plant in raised beds. For more information on making raised beds and improving soil quality check out our next installment in our Summer Garden Series, “Prepping for Your Summer Garden”.

Now that you know the texture of your soil, you may want to test the pH levels (i.e. alkaline versus acidity). Most plants will still grow with a non-ideal pH but they will not produce to the best of their ability if the soil is too acidic or too alkaline. Home tests can give you a general indication of pH but they are not always very accurate. So if you are concerned about your pH levels, we recommend sending a sample to your local extension service. If you don’t want to deal with sending out a sample, you can also always do a quick search for what the common soil pH found in your area is to get an idea of what to expect in your region.


Step 3: Selecting Your Plants and Making a Plan


Spring Blog 2

Figuring out which plants will grow best in your space based on soil, light and water can be a REAL pain. Lucky for you we at CC Grow have taken out the legwork by creating our plant Phytotheca. Simply enter your lighting, water and soil requirements using the drop down tabs and let the endless planting possibilities come to you! As you are selecting your plants, take special note of the required spacing and suggested companion plants and jot these down for later.

Next is getting an idea of the size of your space. Grab a measuring tape and a friend and walk your garden’s length and width, taking measurements as you go. On a piece of scrap paper or graphing paper draw out your garden roughly to scale and break it down using a key of 1 inch= 1 foot as has been done below for this sample 4’ x 10’ garden.


Large Screen Shot
C = Cabbage, variety Copenhagen Market (1 plant per 1.5 square feet; grows well with lettuce);
K = Kale, variety Dwarf Blue (1 plant per square foot; grows well with Lettuce)
L = Lettuce, variety Black Seeded Simpson (9 plants per square foot; grows well with beets and kale)
B = Beets, variety Aviv Dark Red (4-9 plants per square foot; grows well with lettuce and cabbage)

Next you will want to start mapping out which plants will go where. First look at the spacing requirement for that plant to figure out how many you can fit into each row. In the above sample, we have selected cabbage, kale, lettuce and beets for our garden. Mark these into your map as has been done above, using the spacing requirements you wrote down earlier. Note that cabbage requires a slightly larger space than the 1’ squares allow so we have left the next square over open to accommodate this plant. You should also consider which plants grow well (or not well) together. In the above example, as lettuce seems to grow well with everything, we have decided to place that in the middle. As cabbage needs a bit more space, we chose to move those to an outside row in case they needed a little more room to sprawl. Use your judgment here if everything you are planting plays well with others! It’s your garden and should be designed to your liking so go wild!

If you are planting in containers the same rules still apply but the mapping will be much easier. Measure your containers and decide what plants will fit in that space. Keep in mind with container growing that there is not an infinite amount of space for your plants’ roots to grow so make sure you are checking out the “Sow Indoors” section within the plant profiles before selecting your crops. If a plant is not recommended for sowing indoors, it will likely not be the best choice for container growing whether indoors or out.

veggies

You’ve completed phase 1! Can you believe it?! Now, you’re not done yet, but within the next couple of weeks, you can start prepping your space and you will be well on your way to fresh, garden-grown veggies. Keep an eye on our Facebook page for help with the next phase of development in the second edition of the Summer Garden Series, Prepping Your Summer Garden. This edition will address how to prepare your soil and beds, start your seedlings and anticipate what you will need to get growing!


[icon name=”bug” class=””]  Happy Gardening!  [icon name=”bug” class=””]

Bountiful Bees and Happy Hives: How to get started with backyard beekeeping

“The hum of bees is the voice of the garden.”

 –Elizabeth Lawrence, Through the Garden Gate

If you’ve been following the news at all within the past couple years, there is a good chance you have read something about honeybees and a phenomenon known as “colony collapse disorder” (CCD). If you haven’t, this mysterious epidemic is essentially when a colony of worker bees simply disappears without a trace, abandoning the queen and her young and ultimately causing the death of the hive. And this doesn’t just happen to one or two hives. In fact, some commercial operations have reported losing upwards of 90% of their active hives, all at once, in just a few short months. Unfortunately, the cause of CCD is still unknown, but the fact remains that the population of honeybees has been declining over the years, and this is not just sad, it’s terrifying.

This is because, as most of us know, bees aren’t only responsible for pollinating pretty flowers. In fact, as of January of this year, the FDA estimated that bees are responsible for upwards of 15 billion dollars worth of commercial crop production in the U.S. 15 billion dollars. That’s no small portion of our food supply. And as the honeybee population continues to suffer high losses, the global population—and our need for food—continues to grow exponentially, creating a recipe for disaster.

But what can be done? As you may have gathered at this point, we at CC Grow don’t believe that the food system should lie in the hands of large industry anyhow, and that includes protecting and encouraging the health of the honeybees. Starting a hive in an urban setting may seem like it would be something that should only be taken on by die-hard apiarists, but this is simply not the case! If you believe in creating community-based gardens of Eden, supporting local agriculture, or are just looking for a new hobby, read on! And let us provide you with some information, tips, and inspiration on how you can spread the honey bee love in your own community.

Step 1: The most important thing to consider before installing an urban beehive is, is this allowed?

 Different cities will have different rules for keeping hives in urban areas, so be sure you are aware of your local rules and regulations. Here in Denver, for example, households can have up to two hives as long as they are kept in the rear 1/3 of the property and are behind a barrier of at least 6 feet (for more information on beekeeping in the Denver area, click here).

Knowing these types of details regarding fencing, distance from neighbors, etc. can be the difference between being a happy hive-owner and having to pay a hefty fine, so make sure you familiarize yourself with your local laws before you do anything else.

Step 2: The next question you should ask yourself is, do I have the necessary space available?

Many types of honeybees are extremely gentle, but can still deliver a painful sting if irritated. To avoid collisions between stingers and skin, hives should be placed in locations that are easy to access but are out of the way of areas with a lot of foot traffic. If you are lucky enough to have a yard for your hive, consider installing a fence or planting a tall shrubbery as this will force your bees to fly higher on their way to and from the hive.

Finding a spot with adequate protection from the elements and access to water can also make a big difference in raising a healthy hive. If you don’t live near a creek or pond, a birdbath or small tub of water placed about 20 feet from the hive should provide bees with adequate amounts of liquid. If placing your hive in an area with little protection from the elements, plants or even a piece of fabric on the sides and/or above your hive can protect it from high winds and extreme heat. Hives do need some access to sun, however, so don’t keep your bees completely in the dark!

Finally, it is a good idea to consider with whom you are sharing your space before installing a hive. Speaking to roommates, landlords, and/or neighbors can help you avoid future confrontation and difficulties if any of your co-habitators happen to not be down with these backyard fuzzy buzzers.

Step 3: You’ve checked in with your neighbors, know the local regulations, and are having some serious honey cravings. So now what?

 Now we finally get to the good stuff and you get to start setting up your bees!

 Picking a Hive

Before ordering your bees, make sure you have an adequate home for them. Hives can either be built or bought depending on your time availability and budget. If you are looking to harvest honey and are fairly new to beekeeping, we suggest the tried and true langstroth hive (see image below) or a top bar hive.

Keep in mind that hives come in all shapes and sizes however, so if you are unsure of what hive you need to suit your needs, check out this great resource from beethinking.com to help you find the hive that is best for you.

 Selecting Bees

Next up is selecting what kind of bees you want to keep. While there are many options for beginner beekeepers, Russian and Italian bees are a great place to start as they tend to be more docile breeds. Russian bees in particular are a good option as, in addition to being calmer than other varieties, they are also resistant to many common pests. Depending on where you live, however, some bees may be better suited than others, so don’t be shy about asking around for suggestions.

 Receiving Your Bees

The two options for purchasing your bees are to either buy a nucleus (nuc) colony or purchase your bees as a package. Nuc colonies are those which have already started their community (the queen has been accepted and is laying eggs) and come on a frame, or frames, that can be simply slipped into your langstroth hive.

Package colonies, on the other hand, are just that: a package of bees that haven’t quite started building their colony yet. These bees will come in a cage or box rather than on a frame and are poured into the new hive. The queen will need to be kept in her box within the hive while the colony gets adjusted and settles in, but after a few days, the queen can be released from her box to resume laying eggs.

If a local supplier in your hood sells bees, we recommend this option as picking your hive up in person means less stress on the bees and an added bonus of saving you shipping and handling. If this is not a possibility, however, never fear! The U.S. postal service will actually ship your brood for you and call you when it’s time to pick them up.

So that’s it! You did it! Unfortunately, you will probably not get very much honey from your colony in the first year. In the meantime, enjoy getting to know your fuzzy little buzzers until next season and take pride in the fact that you are helping your community’s ecosystem thrive.

Deep Roots: A (brief) history of, and case for, urban gardening

“The ultimate goal of farming is not the growing of crops, but the cultivation and perfection of human beings.”

Masanobu Fukuoka, The One-Straw Revolution

My grandmother was the kind of person that had tricks for everything, especially when it came to the garden. Aphids got you down? Try a homemade garlic or hot pepper spray. African violets dying? Give them a quarter turn or move them to a more northerly facing window. Tomatoes stunted? Well, you might be on your own there. Growing the perfect tomato is simply in an Italian’s blood.

Her knowledge seemed endless to me as a child, and rather than becoming disillusioned as an adult, I have come to respect even more the breadth and depth of her wisdom. She taught my mother, who in turn taught me, that knowing how to grow plants is a blessing, a tradition, and a labor of love that is and has always been integral to the human experience and survival.

You see, for my grandma’s generation, and her mother’s before her, and so on, gardening was not just a hobby, it was a necessity. For immigrants to the US, jobs were scarce, pay was low, and food on the table was not always a guarantee. The story was the same for millions of other families all over the country. Urban gardens provided a sense of security and sustenance for those that lived not knowing what the next day might bring.

 And then the World Wars hit and food scarcity stopped being a problem just for the poor. Labor was limited and transportation systems were needed to move machinery, weapons, and other goods instead of grains. To combat these shortages, the government encouraged the planting of “victory gardens” to reduce the demand on the food supply system and support the efforts of the war. By the final years of the conflict, over 40% of all fresh food in the country was coming from household gardens, playing no small role in sustaining the health and morale of US citizens while food supplies ran low.

Seeds of Victory

But why is any of this relevant to us today?

While we may not be in a conflict with another nation or experiencing the type of poverty seen by our grandparents, we are still indeed at war: only this time, the enemies are obesity, climate change, and a burgeoning population. As many of the solutions offered by corporations and governments have clearly not solved these problems (and in many instances made them worse), I say it is time we take the path of our predecessors and give the power back to the people by putting our spades to the dirt!
AgriBusiness

Now I am not suggesting that we all quit our jobs and live out our days hoeing and weeding and struggling to make ends meet as in the days of yore. Even my grandmother who loved her garden almost as much as her grandchildren probably wouldn’t have suggested something so drastic. But planting a small-scale garden in the yard, on the roof, or in a greenhouse? Now that is another story.

Since the time of victory gardens, urban gardens have been used to encourage a sense of community, healthy eating, and purpose for those who choose to practice it. In projects all over the country, gardens have sprung up in vacant lots providing livelihoods for the unemployed and breathing life and beauty back into economically depressed cities. Gardens in school playgrounds have taught children about the miracles of the earth and the benefits of eating healthy, while community gardens have provided neighborhoods with nutritious food supplies that sustain the soul as well as the stomach.

This is not to say that urban gardens are the silver bullet for all of today’s trials and tribulations, but if they have provided families with food and even helped pave the path to victories in wars for many generations past, who’s to say they can’t have the same kinds of monumental impacts in today’s world?

Winter Gardens and Cover Crops

With winter, everything slows down. Evenings are long, and time is available for fire-gazing and musing about life. But a gardener’s awareness never turns too far from their growing goals—or the warmer seasons to come.

I moved into a new house this year, and my first priority was mapping out where the garden would go. I couldn’t quite tell where my roommate’s partner had grown some stuff in the past, so I picked the barest spot along the perimeter of the fence and got to work.

The soil had been covered in landscape fabric (ugh!) under mulch and looked grey, thick, cracked, and dead. I did a little digging but soon decided the best approach is to always work with, rather against, nature. So I planted a cover crop.

My cover crop of choice was rye, a quick growing grass that can tolerate cold Boulder winters. I tried inter-cropping some arugula and spinach, but most of those seedlings didn’t do well in the wet, clay soil. Some survived but were too tiny to eat. I’m excited about waiting until spring when the soil warms and seeing if their established roots can deliver them a boost of energy and nutrition and thus give me tasty, early-spring salads.

At the start of the spring, I’ll dig my cover crop into the earth, preventing it from re-seeding as well as allowing the decaying bits to give my soil a dose of the all-important organic matter that plants crave. Because the grass will be green when it’s worked into the earth, the nitrogen and carbon found in the leaves will slowly decompose with the aid of fungi, bacteria, and earthworms, whose presence in the soil is also beneficial. After spending countless years smothered underneath the weed-barrier fabric, the soil was probably pretty dead compared to the healthy ecosystem it’s meant to be. Now, in the dead of winter, is the time to begin the rejuvenation process.

With healthy soil comes healthy plants and healthy people who get the joy of eating those plants, and that, in the end, is our goal.

garlic shoot

I also started some garlic and transplanted some wild scallions/walking onions from another part of the yard. They just had time to send up a few green shoots before snows began to fall. Now, they’re laying dormant under a layer of mulch. These, too, will make it through winter and survive our snows to greet the sun of springtime and, eventually, the dinner table a few steps away from where they will soon sprout anew.