Prepping Your Summer Garden

Feeling ready to take advantage of this delightful spring weather and start getting your hands in the dirt? We sure are!

So hopefully you’ve had enough time to get through all the steps lined out in part one of our Summer Garden Series. If so, you know what you are going to grow, where or in what you will grow it, and, if you’re starting in the ground, what your soil type is. Our next steps are going to be preparing your soil or other growing medium, getting your gardening supplies, and starting seeds or buying transplants. So let’s dive into our second edition!


Prepping Your Summer Garden


Step 1: Prepping Soil or Site

dirt ground placeholder


Your soil test is good and you’re going to grow directly in the ground.

dirt garden sprout plantLucky you! You’re in the Goldilocks zone of soil with a nice loamy, rich ground. All you’ve got to do with your site is make sure to get rid of any weeds, and you should be good to go. Some organic weed control options to get you going are sheet mulching (to smother the weeds) or hand pulling (if you’ve only found a few).

If you’ve got a space that’s super overrun with weeds and are patient enough to wait to start growing there, you can solarize your garden area by covering it with a sheet of clear plastic for 1 to 2 moths of hot sunny weather, usually starting in the late summer. This process should kill most weeds, weed seeds, and soil pathogens and will have you ready to start some fall crops or green manure cover crops that will set you up great for growing veggies next year.


Your soil needs some amending

gardening mix soil scoopSo if your soil is in need of some love, first you’ll need to determine what it needs. Generally, the addition of organic matter is a good solution for soils that are either too sandy or too clayey. However, each requires a different type of organic matter.

Sandy soils will benefit from well-aged compost or manure in order to help increase the water holding capacity of these loose and quick-draining spots.

Clay-heavy soils will be helped by the addition of fibrous organic matter like composted mulches, straw, or well-rotted manure. These materials will improve aeration and drainage in this soil type.

No matter which type of soil you are amending, it is good to have a mix of short and long term solutions. Things like grass clippings and manure will decompose rapidly, breaking down and feeding your plants quickly in the first few years. Other soil components like straw and mulch will stick around for much longer and provide benefits well into the future. Similarly, calcium additions like gypsum, dolomitic limestone, or calcitic limestone will quickly provide this nutrient to plants, but using other materials like eggshells or oyster shells will provide a longer-term solution.

One important caveat is to not over-amend your soil. It may take years to get the ideal soil, so don’t try to rush it and create more problems for yourself. For annual vegetable and herb gardens, it’s likely that you’ll be able to keep adding more amendments each year or each season, and overdoing it in one year can result in nutrient imbalances which stunt plant growth (too little available nitrogen) or burn them (too much available nitrogen), or even cause salt build-up in your soils (this is particularly a problem with the use of manures). Uh-oh.


You’re growing in a container or raised bed 

raised bed gardenIf you’ve decided to build your own raised beds, you’ll need some materials. We recommend picking sustainably certified wood or using re-purposed materials like you might find at a used building supply store. Here in Boulder, we’ve got ReSource Yard, but many communities have a Habitat for Humanity ReStore, another great place for finding gently-used building supplies. You could also make a garden by finding discarded pallets and using those to build your raised beds. Just make sure that their wood hasn’t been treated with any chemicals: if you find a stamp with the letters HT, meaning heat treated, then you’re good to do. A second option would be buying some pre-built raised beds or ready to assemble building kits.

Once you’ve built your bed, you’ll need to clear and level the site it will go on, and it’s best to incorporate some sort of organic weed barrier at the bottom. We recommend layers of burlap and/or cardboard at the bottom of the bed, and a thick layer of mulch around the outside path area to keep weeds down.

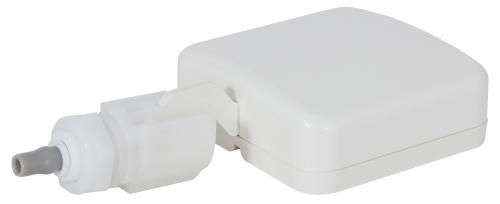
If you’re going to go for container gardening in a smaller space, you’ll have to find some large containers and a soil or soilless mix to fill them with. Most plants like to have at least 6–10” of depth for their roots, with root crops needing more. There are plenty of self-watering planter designs to check out that will keep your maintenance time down if you’re feeling busy.

pots pile containersOnce you’ve picked your container, you’ll need to find a soil blend to fill it with. Look for a complete potting mix that is well drained and contains organic ingredients like topsoil, coco coir, perlite, and/or vermiculite, and make sure your mix contains an organic nutrient source like compost or worm castings.

For some extra fun, you can make your own by buying individual components for a custom mix. Use clean and sanitized topsoil, compost, sand, coir, bark, perlite, vermiculite, limestone, and a natural fertilizer source.


 Step 2: Get Your Gardening Supplies

tool garden
All gardeners need a tool set, so pick up some good quality hand tools for a start. A shovel and rake will be helpful for spreading and mixing those amendments into the ground, and a hoe will make weeding go quickly. A wheelbarrow or cart is great for hauling amendments and moving flats of transplants from their nursery location to the planting area, if you’ve got a large space.

You’ll also need flats or small containers to start seeds in. Buy some pots or find your own DIY or upcycled solution, but make sure that each container has adequate space for roots and is large enough that it won’t dry out too quickly (egg cartons are not an ideal choice here). Be ready to transplant seedlings into bigger containers as they grow.

If you’re starting seeds and/or growing indoors for season extension, a lack of outdoor space, or for a fun and air-purifying experiment, you’ll need some growing lights. We recommend using high output fluorescent bulbs for starting seeds and for growing herbs, root veggies, or leafy greens. If you want to get some fruits (tomatoes, peppers, squash) out of your indoor garden, you’ll need a brighter and more powerful lighting system to make plants switch over to flowering and fruiting. Here, we’d recommend an LED setup or HID metal halide lamps. You’ll also need a timer system for the lights and some fans to keep air flow going and promote healthy plants.

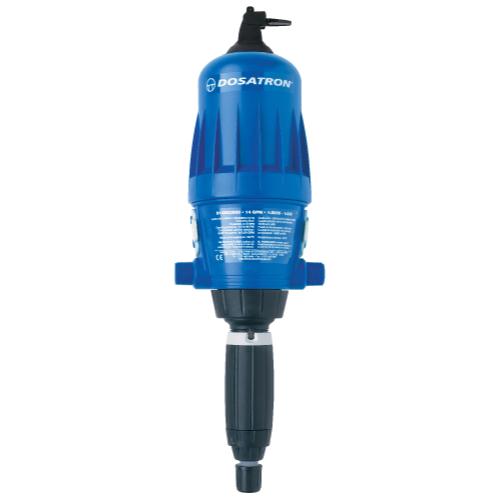
All plants need water, so get a watering can based on the size of your growing space. Small indoor herb gardeners can get by with a cute little watering can, or go for a bigger one or an irrigation system for your outdoor garden.


Step 3: Getting your plants ready

file000589794879


Starting seeds

No matter what and where you’re growing, you will need plants! Seeds or starts should be chosen based on your timeline, average frost dates, and what you’re growing. Check out our extensive Phytotheca database for the plants you’ve chosen to see how easy or hard they are to start from seed, how long they take to germinate, and whether we recommend that you plant inside or outside. Based on this information, you can easily decide which seeds are worth buying, which to start on your own indoors, and which can be sowed directly in your soil or growing media outdoors.

sprout start tomatoIf you’ve decided to buy starts from a local farm or grower, you can skip this next step! But we recommend trying at least a few seeds indoors on your own for a growing experiment.

First, fill your flats, containers, or small cups with a seeding mix. This soilless mix does not need any nutrients, as seeds actually contain all they need to grow in their first set of “seed leaves.” The mix also needs to be sterile, so that your baby plants can germinate in a clean and healthy environment. This initial phase of development is super important for plants, so they need to be kept moist and in a well-lit and stable temperature environment. Check out the Phytotheca entries for information on what temperature each seed needs to germinate, and use a heat mat if your growing conditions indoors aren’t adequately warm.


Caring for Starts and Transplants

Most seeds don’t need light to germinate, but once they’ve sprouted leaves, they will need a light source, as will any transplants you’re not quite ready to put in the ground yet. Keep lights close to the plants to avoid seedlings getting too leggy and weak stemmed, and adjust the light up as plants grow to keep them from burning. They’ll also need some nutrients as they get larger. Once a week, you should water little plants with a very dilute solution (half to quarter strength) of liquid seaweed, fishmeal, or balanced liquid fertilizer. Keep the soil evenly most at all times, and provide air flow for plants with a small fan to strengthen them.

Before planting transplants, whether you’ve grown them or bought them, they’ll need to adjust to outside conditions. This process is called hardening off and requires you to set your plants outside, in a shady location at first, for gradually increasing time periods during each day. You can also slowly increase the amount of direct sunlight that plants receive each day, until they are ready and well adapted to the conditions you will be planting them in.


pumpkin sprout 01

OK, that’s it for this edition. Check back in soon or keep an eye on our Facebook page for the next edition in our summer garden series, and what might be the most exciting phase of your gardening process: Planting Your Summer Garden! We can’t wait.

Planning Your Summer Garden

It’s finally here folks! Spring has officially SPRUNG and summer is just around the corner, which means it’s time to start planning those gardens!

I’ve always loved summer more than any other season. To me, summer means beaches, playing outdoors, sunshine and perhaps best of all, FRESH VEGGIES!! Whether you participate in a local CSA, frequent the farmers market or plant your own garden, summer is a time to be outdoors and to revel in the magic that is the earth’s ability to make food grow. And while we fully encourage you to support your local farmers, we also believe that the best way to get fresh food into your kitchen is to grow it yourself! True, coaxing plants out of the ground is not always an easy task but the benefits are absolutely worth the efforts and we at CC Grow are here to help you every step of the way. So without further ado, lets get you gardening with our first edition in our Summer Garden Series.


Planning Your Summer Garden


Step 1: Setting an Intention

Spring

Gardens are not just a resource for food. In many ways they are an art form, a means of expression, a place to escape and a way to reconnect with ourselves as well as the earth. As such, they should be planned with consciousness, care and an idea of what we want to get out of them. This is why a great first question to ask yourself is, what do I want from my garden?

Are you looking to have a garden filled with as many options of vegetables as the supermarket, or are you feeling like you may only have time for one or two favorites? Do you want to try to plant something new and exotic, or are you feeding picky eaters? Is the appearance of your garden as important as it’s functionality?

These are the types of questions whose answers will help you narrow down your garden goals and set priorities. Then when it comes to questions of space and time, you can make appropriate decisions that will help you set yourself up for success.


Step 2: Gauging the Essentials

file5301305395463

Even the most “green” gardener knows that soil, water and sunlight are essential when trying to get things to grow, so this is a great place to start when planning your garden.


Let there be Light!

Yes, lighting will change slightly with the seasons but you definitely want an idea of where you fall on the sunlight spectrum before you start digging into the dirt.

Take a few days to figure out where you are planning on putting your garden and watch the lighting. Does your area have full sunshine or are there obstructions? How long does that area get light? Many types of summer vegetables need at least 6 hours of light per day so try to choose an area that meets this requirement. If this is not possible, never fear! There are plenty of plants that actually prefer shade or partial shade but this is important to know ahead of planting time.

If you are completely lacking consistent sunlight, planting in containers is a great option as these can be moved to different areas to catch some rays. Keep in mind however that you don’t want to be lugging your pots around all day (especially heavy ones!) so planting shade-friendly plants will likely still be your best option.


Water, Water Everywhere or Not a Drop to Spare?

 Spring blogDepending on where you live, you can generally make a good guess as to how much natural precipitation you are going to get during the summer.

Here in Colorado for example, we experience long periods without any rainfall so a good gardener will keep in mind that a lot of irrigation will need to be done by hand. If you’re planning a large garden, check out where your spigots are and if you’ll be able to set up a sprinkler or drip irrigation system. A drip system is one that utilizes tubes with tiny holes pre-punched into the surface. These tubes can be hooked up to a barbed fitting that will attach to your spigot. The tubes are then laid throughout the garden where they will—you guessed it—drip, providing a slow but constant source of water for your plants.

If an outdoor water source isn’t available, consider scaling down your garden as filling your watering can 50 times can be a real pain, or plant in containers that can be brought inside and watered in the kitchen sink.


Lets Get Dirty: Testing your soil quality

If you are planting your summer garden in containers or raised beds, you spring blogwill have the freedom to hand pick the soil that you are going to be working with. In order to make the most accurate choices, you will need to select your plants first, so feel free to skip to Step 3.

If you are planning on planting directly in the ground however, you will first need to figure out your dirt quality and characteristics.The first thing you want to know about your soil is what kind of texture it has. Although you can send away a sample of your soil to local labs or extensions for testing, we recommend a simple hand and ribboning test.

The Hand Test: Grab a handful of soil (go on, don’t be shy!) and remove any rocks or bits of debris and break up large clods. Moisten the soil in your hand (an old college professor of mine used to swear that spit is best but we’re sure tap water works great too!) and squeeze it into a little ball. As you are working your dirt into a ball, try to feel what’s present in the soil. Does it feel grainy or smooth? Does it work into a ball easily or is it falling apart? Keep these qualities in mind as it will be important in the next step of the process.

Ribboning: After a minute or two of forming your soil into a ball, you are going to start “ribboning” it. To ribbon your dirt, push the ball with your thumb against your forefinger so it starts to flatten out. It will break off under it’s own weight, and these broken pieces are the bits you will need in order to figure out your soil content. Once you have a couple pieces of “ribbon”, use the below chart from the Colorado State Extension Service to identify your soil texture.

Screen Shot 2015-03-20 at 10.01.07 AM

If your soil is overly sandy or very heavy in clay you will have to add amendments before planting or plant in raised beds. For more information on making raised beds and improving soil quality check out our next installment in our Summer Garden Series, “Prepping for Your Summer Garden”.

Now that you know the texture of your soil, you may want to test the pH levels (i.e. alkaline versus acidity). Most plants will still grow with a non-ideal pH but they will not produce to the best of their ability if the soil is too acidic or too alkaline. Home tests can give you a general indication of pH but they are not always very accurate. So if you are concerned about your pH levels, we recommend sending a sample to your local extension service. If you don’t want to deal with sending out a sample, you can also always do a quick search for what the common soil pH found in your area is to get an idea of what to expect in your region.


Step 3: Selecting Your Plants and Making a Plan


Spring Blog 2

Figuring out which plants will grow best in your space based on soil, light and water can be a REAL pain. Lucky for you we at CC Grow have taken out the legwork by creating our plant Phytotheca. Simply enter your lighting, water and soil requirements using the drop down tabs and let the endless planting possibilities come to you! As you are selecting your plants, take special note of the required spacing and suggested companion plants and jot these down for later.

Next is getting an idea of the size of your space. Grab a measuring tape and a friend and walk your garden’s length and width, taking measurements as you go. On a piece of scrap paper or graphing paper draw out your garden roughly to scale and break it down using a key of 1 inch= 1 foot as has been done below for this sample 4’ x 10’ garden.


Large Screen Shot
C = Cabbage, variety Copenhagen Market (1 plant per 1.5 square feet; grows well with lettuce);
K = Kale, variety Dwarf Blue (1 plant per square foot; grows well with Lettuce)
L = Lettuce, variety Black Seeded Simpson (9 plants per square foot; grows well with beets and kale)
B = Beets, variety Aviv Dark Red (4-9 plants per square foot; grows well with lettuce and cabbage)

Next you will want to start mapping out which plants will go where. First look at the spacing requirement for that plant to figure out how many you can fit into each row. In the above sample, we have selected cabbage, kale, lettuce and beets for our garden. Mark these into your map as has been done above, using the spacing requirements you wrote down earlier. Note that cabbage requires a slightly larger space than the 1’ squares allow so we have left the next square over open to accommodate this plant. You should also consider which plants grow well (or not well) together. In the above example, as lettuce seems to grow well with everything, we have decided to place that in the middle. As cabbage needs a bit more space, we chose to move those to an outside row in case they needed a little more room to sprawl. Use your judgment here if everything you are planting plays well with others! It’s your garden and should be designed to your liking so go wild!

If you are planting in containers the same rules still apply but the mapping will be much easier. Measure your containers and decide what plants will fit in that space. Keep in mind with container growing that there is not an infinite amount of space for your plants’ roots to grow so make sure you are checking out the “Sow Indoors” section within the plant profiles before selecting your crops. If a plant is not recommended for sowing indoors, it will likely not be the best choice for container growing whether indoors or out.

veggies

You’ve completed phase 1! Can you believe it?! Now, you’re not done yet, but within the next couple of weeks, you can start prepping your space and you will be well on your way to fresh, garden-grown veggies. Keep an eye on our Facebook page for help with the next phase of development in the second edition of the Summer Garden Series, Prepping Your Summer Garden. This edition will address how to prepare your soil and beds, start your seedlings and anticipate what you will need to get growing!


[icon name=”bug” class=””]  Happy Gardening!  [icon name=”bug” class=””]

Bountiful Bees and Happy Hives: How to get started with backyard beekeeping

“The hum of bees is the voice of the garden.”

 –Elizabeth Lawrence, Through the Garden Gate

If you’ve been following the news at all within the past couple years, there is a good chance you have read something about honeybees and a phenomenon known as “colony collapse disorder” (CCD). If you haven’t, this mysterious epidemic is essentially when a colony of worker bees simply disappears without a trace, abandoning the queen and her young and ultimately causing the death of the hive. And this doesn’t just happen to one or two hives. In fact, some commercial operations have reported losing upwards of 90% of their active hives, all at once, in just a few short months. Unfortunately, the cause of CCD is still unknown, but the fact remains that the population of honeybees has been declining over the years, and this is not just sad, it’s terrifying.

This is because, as most of us know, bees aren’t only responsible for pollinating pretty flowers. In fact, as of January of this year, the FDA estimated that bees are responsible for upwards of 15 billion dollars worth of commercial crop production in the U.S. 15 billion dollars. That’s no small portion of our food supply. And as the honeybee population continues to suffer high losses, the global population—and our need for food—continues to grow exponentially, creating a recipe for disaster.

But what can be done? As you may have gathered at this point, we at CC Grow don’t believe that the food system should lie in the hands of large industry anyhow, and that includes protecting and encouraging the health of the honeybees. Starting a hive in an urban setting may seem like it would be something that should only be taken on by die-hard apiarists, but this is simply not the case! If you believe in creating community-based gardens of Eden, supporting local agriculture, or are just looking for a new hobby, read on! And let us provide you with some information, tips, and inspiration on how you can spread the honey bee love in your own community.

Step 1: The most important thing to consider before installing an urban beehive is, is this allowed?

 Different cities will have different rules for keeping hives in urban areas, so be sure you are aware of your local rules and regulations. Here in Denver, for example, households can have up to two hives as long as they are kept in the rear 1/3 of the property and are behind a barrier of at least 6 feet (for more information on beekeeping in the Denver area, click here).

Knowing these types of details regarding fencing, distance from neighbors, etc. can be the difference between being a happy hive-owner and having to pay a hefty fine, so make sure you familiarize yourself with your local laws before you do anything else.

Step 2: The next question you should ask yourself is, do I have the necessary space available?

Many types of honeybees are extremely gentle, but can still deliver a painful sting if irritated. To avoid collisions between stingers and skin, hives should be placed in locations that are easy to access but are out of the way of areas with a lot of foot traffic. If you are lucky enough to have a yard for your hive, consider installing a fence or planting a tall shrubbery as this will force your bees to fly higher on their way to and from the hive.

Finding a spot with adequate protection from the elements and access to water can also make a big difference in raising a healthy hive. If you don’t live near a creek or pond, a birdbath or small tub of water placed about 20 feet from the hive should provide bees with adequate amounts of liquid. If placing your hive in an area with little protection from the elements, plants or even a piece of fabric on the sides and/or above your hive can protect it from high winds and extreme heat. Hives do need some access to sun, however, so don’t keep your bees completely in the dark!

Finally, it is a good idea to consider with whom you are sharing your space before installing a hive. Speaking to roommates, landlords, and/or neighbors can help you avoid future confrontation and difficulties if any of your co-habitators happen to not be down with these backyard fuzzy buzzers.

Step 3: You’ve checked in with your neighbors, know the local regulations, and are having some serious honey cravings. So now what?

 Now we finally get to the good stuff and you get to start setting up your bees!

 Picking a Hive

Before ordering your bees, make sure you have an adequate home for them. Hives can either be built or bought depending on your time availability and budget. If you are looking to harvest honey and are fairly new to beekeeping, we suggest the tried and true langstroth hive (see image below) or a top bar hive.

Keep in mind that hives come in all shapes and sizes however, so if you are unsure of what hive you need to suit your needs, check out this great resource from beethinking.com to help you find the hive that is best for you.

 Selecting Bees

Next up is selecting what kind of bees you want to keep. While there are many options for beginner beekeepers, Russian and Italian bees are a great place to start as they tend to be more docile breeds. Russian bees in particular are a good option as, in addition to being calmer than other varieties, they are also resistant to many common pests. Depending on where you live, however, some bees may be better suited than others, so don’t be shy about asking around for suggestions.

 Receiving Your Bees

The two options for purchasing your bees are to either buy a nucleus (nuc) colony or purchase your bees as a package. Nuc colonies are those which have already started their community (the queen has been accepted and is laying eggs) and come on a frame, or frames, that can be simply slipped into your langstroth hive.

Package colonies, on the other hand, are just that: a package of bees that haven’t quite started building their colony yet. These bees will come in a cage or box rather than on a frame and are poured into the new hive. The queen will need to be kept in her box within the hive while the colony gets adjusted and settles in, but after a few days, the queen can be released from her box to resume laying eggs.

If a local supplier in your hood sells bees, we recommend this option as picking your hive up in person means less stress on the bees and an added bonus of saving you shipping and handling. If this is not a possibility, however, never fear! The U.S. postal service will actually ship your brood for you and call you when it’s time to pick them up.

So that’s it! You did it! Unfortunately, you will probably not get very much honey from your colony in the first year. In the meantime, enjoy getting to know your fuzzy little buzzers until next season and take pride in the fact that you are helping your community’s ecosystem thrive.

Deep Roots: A (brief) history of, and case for, urban gardening

“The ultimate goal of farming is not the growing of crops, but the cultivation and perfection of human beings.”

Masanobu Fukuoka, The One-Straw Revolution

My grandmother was the kind of person that had tricks for everything, especially when it came to the garden. Aphids got you down? Try a homemade garlic or hot pepper spray. African violets dying? Give them a quarter turn or move them to a more northerly facing window. Tomatoes stunted? Well, you might be on your own there. Growing the perfect tomato is simply in an Italian’s blood.

Her knowledge seemed endless to me as a child, and rather than becoming disillusioned as an adult, I have come to respect even more the breadth and depth of her wisdom. She taught my mother, who in turn taught me, that knowing how to grow plants is a blessing, a tradition, and a labor of love that is and has always been integral to the human experience and survival.

You see, for my grandma’s generation, and her mother’s before her, and so on, gardening was not just a hobby, it was a necessity. For immigrants to the US, jobs were scarce, pay was low, and food on the table was not always a guarantee. The story was the same for millions of other families all over the country. Urban gardens provided a sense of security and sustenance for those that lived not knowing what the next day might bring.

 And then the World Wars hit and food scarcity stopped being a problem just for the poor. Labor was limited and transportation systems were needed to move machinery, weapons, and other goods instead of grains. To combat these shortages, the government encouraged the planting of “victory gardens” to reduce the demand on the food supply system and support the efforts of the war. By the final years of the conflict, over 40% of all fresh food in the country was coming from household gardens, playing no small role in sustaining the health and morale of US citizens while food supplies ran low.

Seeds of Victory

But why is any of this relevant to us today?

While we may not be in a conflict with another nation or experiencing the type of poverty seen by our grandparents, we are still indeed at war: only this time, the enemies are obesity, climate change, and a burgeoning population. As many of the solutions offered by corporations and governments have clearly not solved these problems (and in many instances made them worse), I say it is time we take the path of our predecessors and give the power back to the people by putting our spades to the dirt!
AgriBusiness

Now I am not suggesting that we all quit our jobs and live out our days hoeing and weeding and struggling to make ends meet as in the days of yore. Even my grandmother who loved her garden almost as much as her grandchildren probably wouldn’t have suggested something so drastic. But planting a small-scale garden in the yard, on the roof, or in a greenhouse? Now that is another story.

Since the time of victory gardens, urban gardens have been used to encourage a sense of community, healthy eating, and purpose for those who choose to practice it. In projects all over the country, gardens have sprung up in vacant lots providing livelihoods for the unemployed and breathing life and beauty back into economically depressed cities. Gardens in school playgrounds have taught children about the miracles of the earth and the benefits of eating healthy, while community gardens have provided neighborhoods with nutritious food supplies that sustain the soul as well as the stomach.

This is not to say that urban gardens are the silver bullet for all of today’s trials and tribulations, but if they have provided families with food and even helped pave the path to victories in wars for many generations past, who’s to say they can’t have the same kinds of monumental impacts in today’s world?

Front Range Bioneers

I was excited to attend the 2014 Front Range Bioneers Conference held at the University of Colorado Boulder campus, just a short bike ride from my home. Presentations from local businesses, farms, and community groups were supplemented with live performances and informative and inspiring videos of presenters recorded at the national Bioneers Conference, held earlier in the year in California. I felt like this event would offer me a chance to connect with others who are interested in implementing sustainable change in the Front Range community.

Though it was extremelboulder co flatironsy difficult to choose which of the myriad workshops I would attend, I did, of course, end up at a few food-centered talks. At the Local Farms session, I got to hear a panel of four Boulder County farmers discuss the joys and hardships of trying to provide healthy food to their communities while sustaining a small business and dealing with the fickle Colorado weather and governmental bureaucracy. The unfortunate bottom line: don’t expect to quit your day job immediately (or ever…) if you choose to start a farm.

Many local food and farm centered organizations sent representatives to talk about their activities.

Denver’s non-profit GrowHaus is working on providing economic and educational opportunities for low income residents in their neighborhood. They are working on the cutting edge of modern farming with productive and efficient hydroponic and aquaponic systems in their indoor greenhouse growing spaces.

Longmont-based Garage Grocer runs a neighborhood food co-op, operating on the honor system. Is provides its members with locally grown produce, grass fed beef and dairy products, and other responsibly sourced non-local goods like maple syrup and olive oil.

UrbiCulture Community Farms is practicing a new style of urban farming, using multiple small plots of land to compile a large farm’s worth of produce from within the limits of Denver’s metro area. This both beautifies previously unused urban land and reduces transportation needs inherent in the current food system.

I ended the weekend feeling inspired, grateful, and ready to engage with CC Grow’s mission of helping our community to eat healthily while reducing carbon footprints and reconnecting with our neighbors over a delicious plate of home-grown plant-based food.


Geodesic Dome

On October 11th and 12th, CC Grow team members participated in a greenhouse building workshop led by Regenerative Lifestyles & Denver Earthship, the East Side Growers Collective, and Integrated Aquaponics. Located in Denver’s Park Hill neighborhood at the community garden of the East Side Growers Collective and focused on building a geodesic dome greenhouse for their community garden, the workshop was centered around hands-on learning through action. We spent two days putting in a lot of hard work building, as well as talking about, one type of year-round growing option available here in Colorado. Most excitingly, we got to meet and connect with a diverse group of growers and community members and were able to see concrete results from our group effort as the dome’s structure was completed and raised.

The design of the greenhouse incorporates sustainable Earthship elements, including the use of recycled and natural materials. In our case, this was accomplished through a rammed earth foundation, re-using old tires as forms for the earth. In the future, the dome will have a water collection and recycling feature, which can possibly be integrated into a year-round aquaponic growing system. It will also use a small solar panel system for ventilation on sunny days when the inside of the dome could get too warm without some added air flow. The dome also makes use of the earth’s thermal mass for year-round temperature regulation, as the floor height is sunk several feet below ground level.

As the dome is completed and covered, it will serve as a year-round food production area for members of the East Side Grower’s Collective, as well as providing space for those gardeners to start plants and seeds early in the season, thus increasing their annual crop yields.

We are glad to have contributed to the rebuilding and improvement of this urban location. Historically, the space was used as a landfill and subsequently a parking lot for a shopping complex; after this failed, the lot was ultimately left abandoned. Now, thanks to community efforts, we see it becoming a bountiful food production area and gathering space. Additionally, our team learned a sustainable building method and design which can result in an attractive and simple year-round garden for our clients’ backyards or neighborhoods.

Filling rammed earth tires for the first level of the foundation - three levels to go!
Filling rammed earth tires for the first level of the foundation – three levels to go!